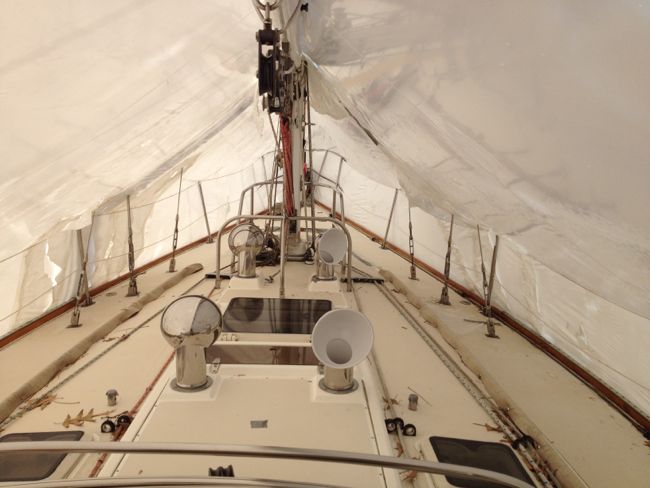
Between the brutal temperatures, ice storms (2) and snow storms (2), February turned out to be a total loss for boat projects. With so much time lost it will be a mad dash from here to make our planned mid-April launch target. Fortunately, this weekend the temperatures were up and the spring melt looks to be on, so back to the boat yard I went.
The trek between boat and Suburban is long and slushy, so Saturday morning I did one long load of all of the tools and cables should need for the spring, then dragged my soggy-ass feet aboard to get a start.
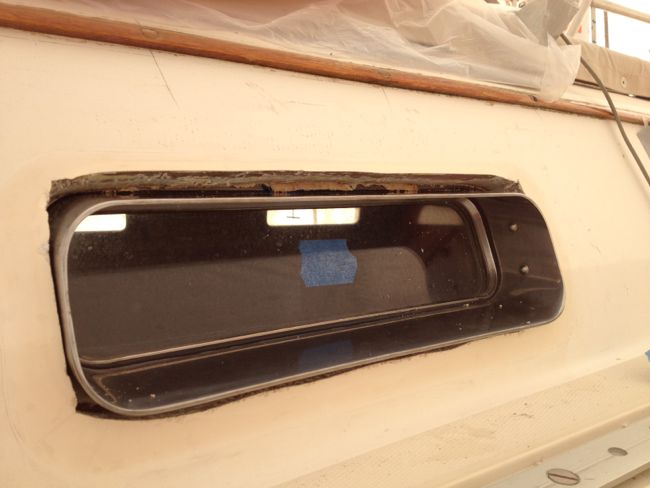
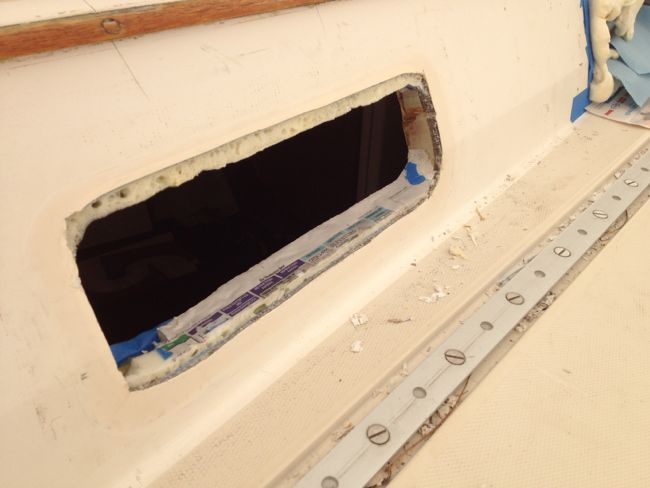
 Finally back to work, I attacked the biggest monkey-on-the-back of this winter’s projects: re-bedding the leaky opening portholes. It sounds like s simple enough project but it’s turned out to be a massive job. The biggest complicating factor is the huge gap between the holes in the deck and my porthole frames. I suspect this boat may originally have been equipped with larger portholes than the ones it has now. The huge gap was previously filled purely with caulk, but that solution has proven to be highly failure prone (note: five of the six portholes leaked as soon as we encountered rough weather last fall).
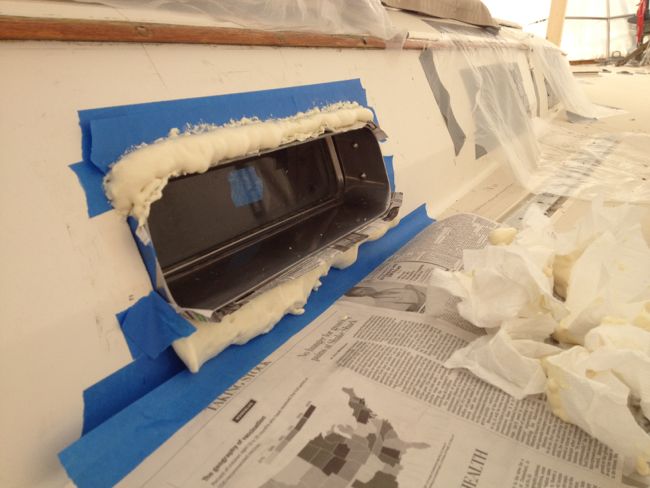
I posted for some Facebook advice back in January and got a great response from a car racing friend – use the same type of expanding foam used to fill gaps in residential window frames. I bought a couple of cans of “Great Stuff” at Home Depot and the advice turned out to be excellent. With the porthole frames in place, I injected the foam and then waited for it to dry overnight.
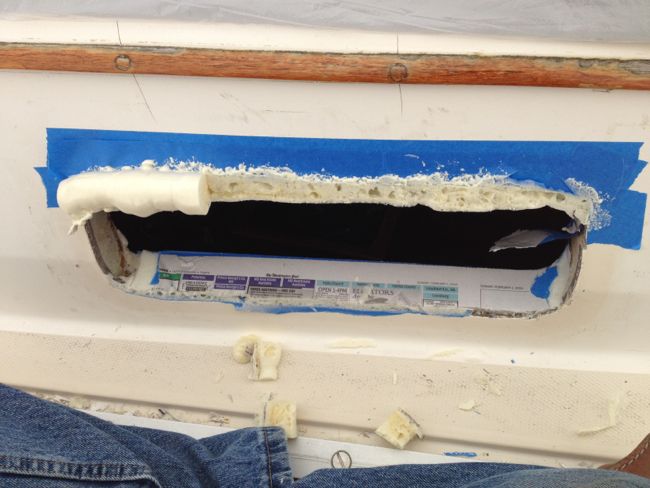
 The excess was then cut off, and I trimmed the foam back far enough from the sheer of the deck to provide a nice little grove into which caulk could be inserted.
 A full month passed while bad weather kept me away, but Saturday I was able to finish the trim-back of the foam.
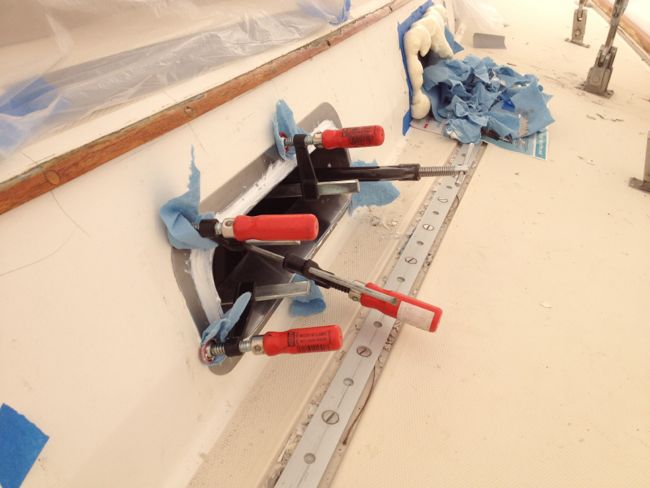
 Then today I was able to inject the caulk and re mount the porthole. The entire procedure is pretty time-consuming, but is infinitely better than injecting tons of caulk into that huge gap and hoping you don’t leave any voids (as I already found out the hard way is easy to do after re bedding one of the portholes that way only to observe rain water leaks afterward). Better still, the caulk now has a solid backing behind it, making it much, much easier to create a good seal. I am delighted with the process and hopeful that it will result in six water tight portholes that stay sealed for years to come. One down and five to go! Fingers crossed they all come out water tight.

Wow, lots of work, but will be worth it. I can’t avoid imagining what sailing would be like with the shrink wrap on *giggle*
How did the portholes survive leaks with the foam a few years later?
So far so good! The ones I did last year have been great ever since including a good test of some ugly weather for 6 hours straight (green water back to the dodger twice!) returning to Newport from Block Island (https://svrover.com/2015/08/10/return-to-block-island-and-a-heavy-weather-sail-home/). Last year I did only four of our six portholes with the foam so this winter I did the last two (yes, they leaked last summer coming back from Block Island which is why I did the foam this winter)! Remember the foam doesn’t do any sealing. It’s just a place holder to give the caulk something to rest on. The caulk does 100% of the sealing out of water.