By Rich
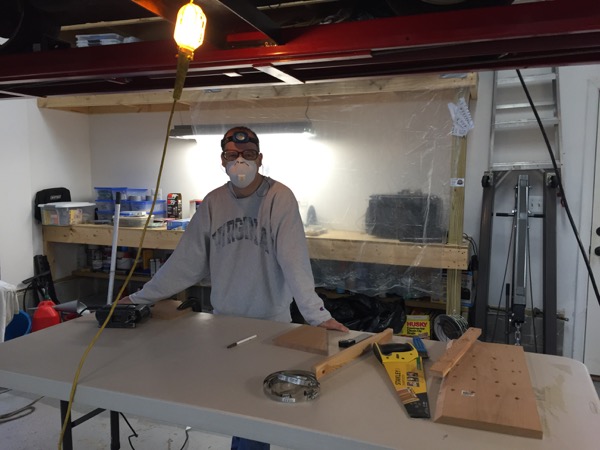
Looking at the photo above, one wouldn’t immediately assume that I’m a guy hung up on vanity. I’m just as happy dusty and grubby in the shop as I am cleaned up n’tidy for dinner at the Club. But I do have one vain hangup: I hate it when boats are out of trim port-to-starboard.
Hate it. Drives me nuts. No idea why.
Our Sabre 42 restoration has put us through a lot over the last couple of years, and falling into the Third Circle of Hell last week dealing with non performing (and at times hostile) vendors has more than a few of our friends feeling sorry for us. But the hours I put into counter-ballasting our Sabre to (hopefully) get rid of a slight starboard list admittedly amounts to self-inflicted pain. And as you’ll see, the scope of this project was pretty big. In my defense, most of the moments spent fabricating the parts shown this this photo essay were stashed into spare evenings in the shop over the winter when weather kept me out of the yard, but I did spend this past weekend completing the work.
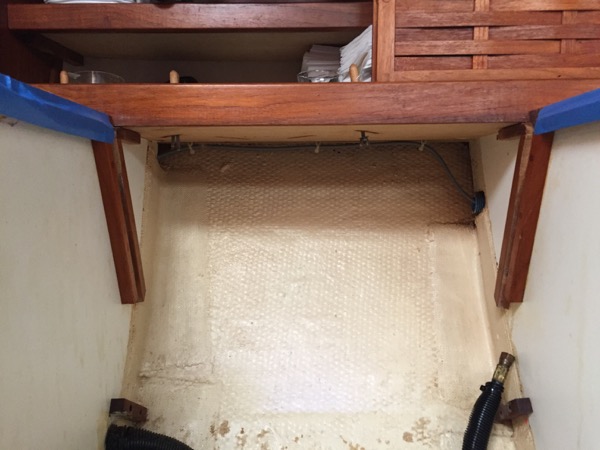
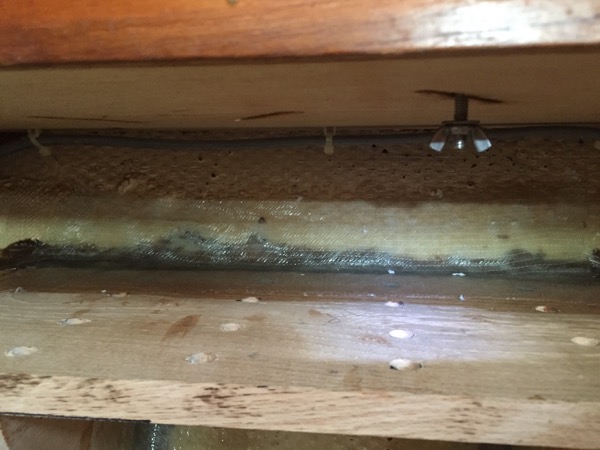
The factory documentation recommends that an out-of-trim condition on Sabre yachts be rectified by bolting lead to the opposite side of the yacht, but the Sabre factory does not offer a counter-ballast kit for the Sabre 42. I considered a variety of places to put the lead but couldn’t find a better candidate than the dead space just outboard of our stove.
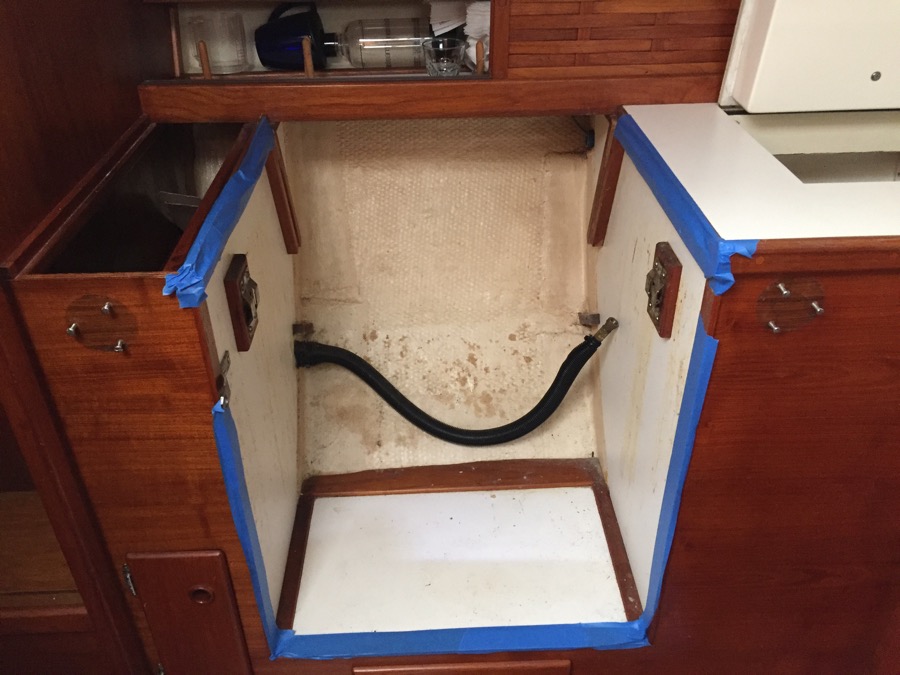
The challenge of using the space? There wasn’t anything nearby to conveniently bolt the lead to. So I decided to pull out the stove and use the project as an excuse to brush up on my fiberglass skills.
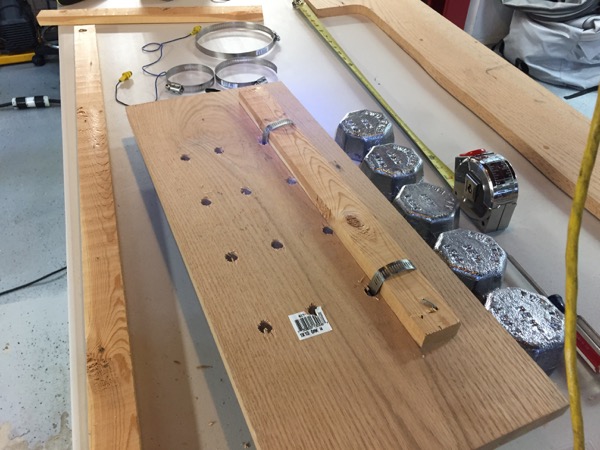
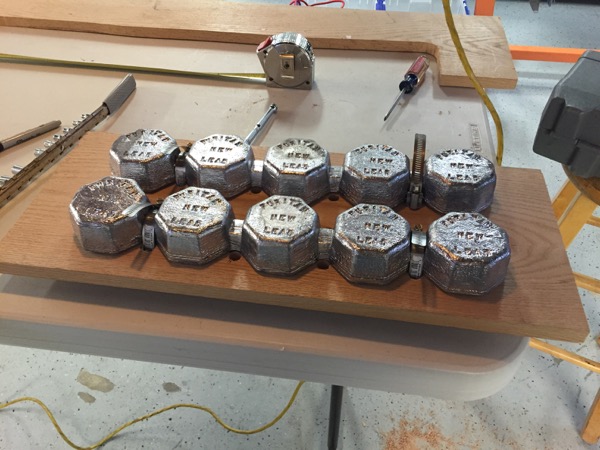
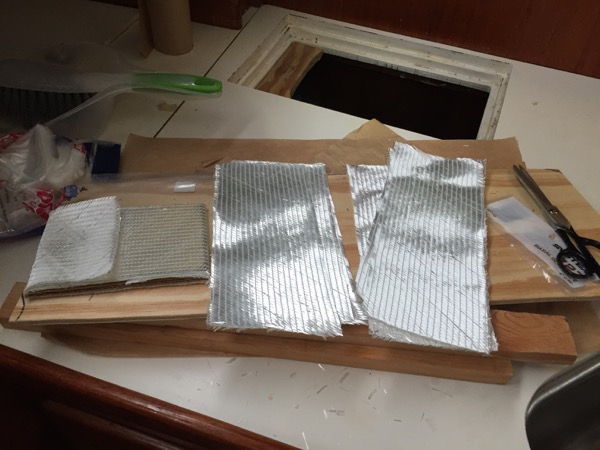
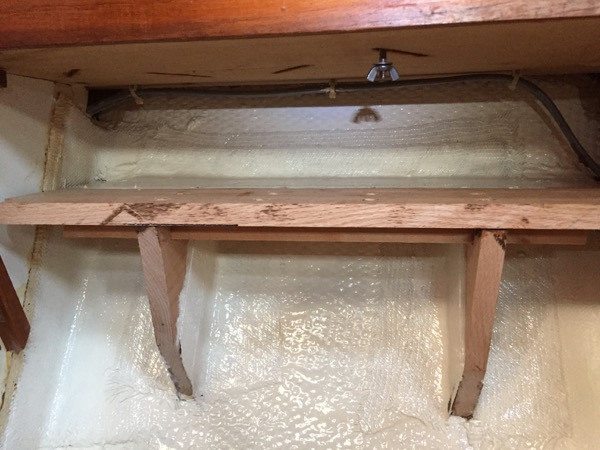
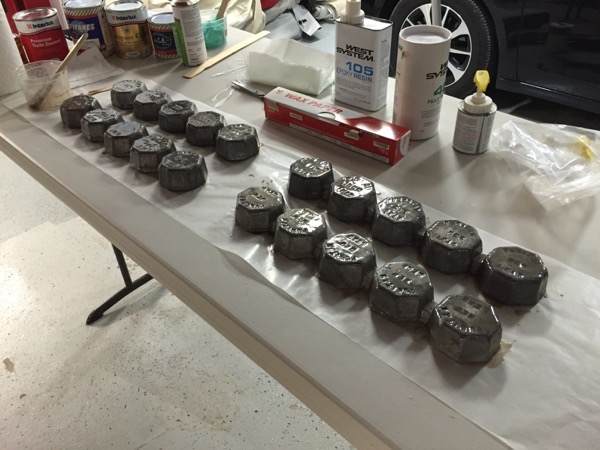
In the shop I pulled out a piece of solid oak (cheap plywood would never do here) and devised a scheme using hose clamps to fasten some lead weights I procured from the local J/70 racing fleet (thanks Peter!) to a section of the board that I cut to the appropriate length.
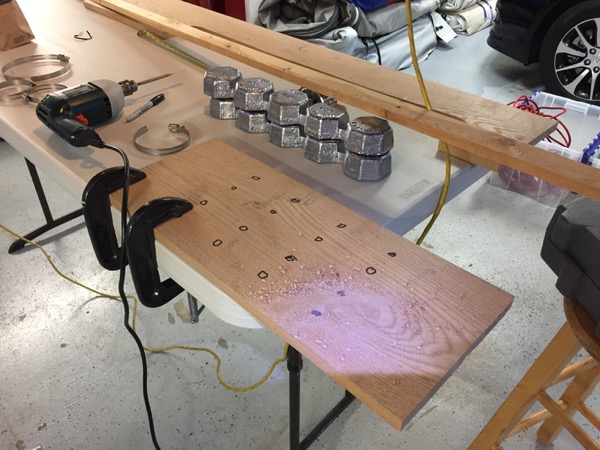
I decided to use strips of pine under the oak plank as backing for the chose clamps.
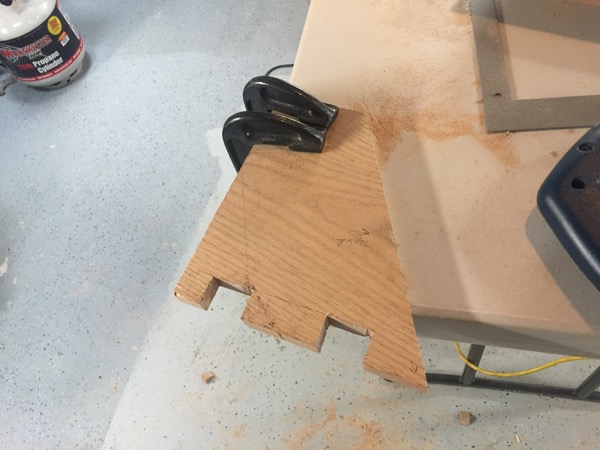
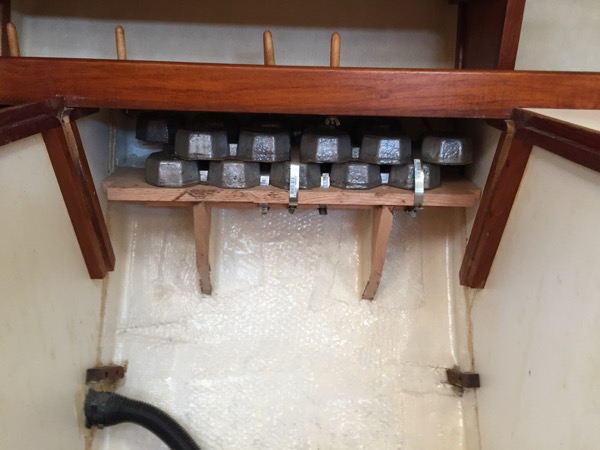
To support my new “shelf” I fashioned solid oak knees, with groves cut in them to accept the wood strips. The bonus here would be that athwartship loads caused by the heeling of the boat would be transferred directly by the pine strips to the knees, meaning that the tabbing holding the shelf to the topside would be assisted by the tabbing fastening the knees.
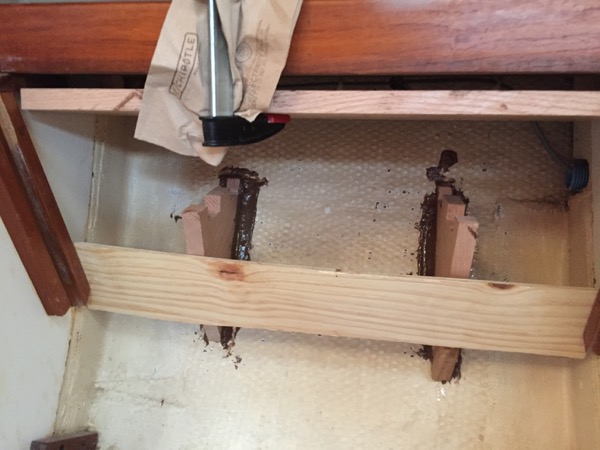
At this point the project paused for many weeks while other work on the boat was completed. But last week I found the time to start tabbing the knees into the boat. I started by cleaning the topside with acetone, then sanding lightly with 80 grit to create a good surface for a mechanical bond. After brushing away the dust, I mixed up some West System and wet down both mating surfaces, then thickened the epoxy batch to roughly the consistency of peanut butter. This thickened epoxy (seen as poop-brown colored in the photos) was applied to the topside and the mating surface of the knees. The knees were then braced to the topside so the fillet could cure. Tongue depressors worked great as “filleting tools” to create the arch I needed for the tabs to conform to.
While the fillet kicked I started cutting tabs out of 17-oz biaxial West System fiberglass cloth.
After around an hour, I wet out the glass cloth, then wet down the mating surfaces and applied two tapes that overlapped over the fillet.
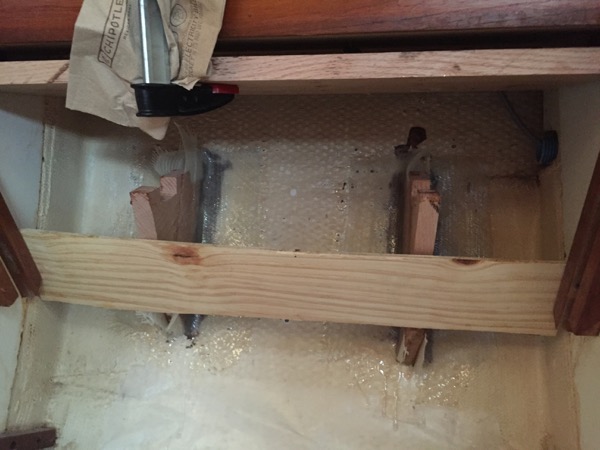
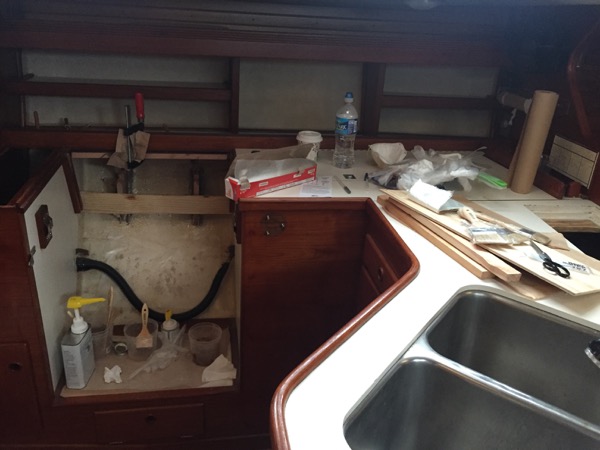
After an overnight cure the galley still looked like a war zone, but the knees were securely tabbed to the hull.
Next I repeated the above procedure to tab the shelf to the topside – starting with a fillet, then applying the tabbing while the fillet was still chemically reactive. I also epoxied the bottom of the shelf to the top of the knees with thickened epoxy. Note that the pine backing strips were applied at this point – because there would be no way to get them in after the shelf was tabbed to the hull!
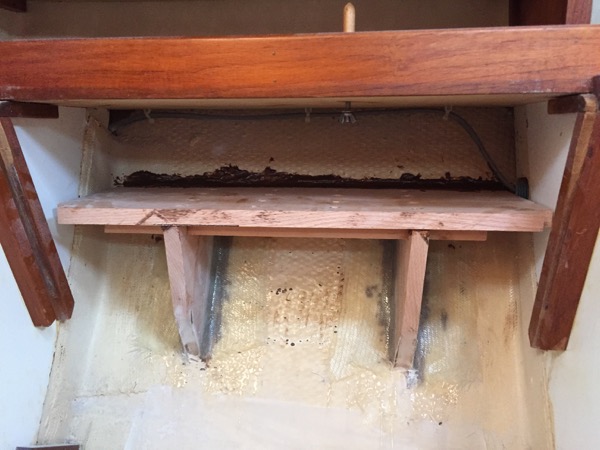
Next I applied a coat of topside paint to the area surround the tabs. This wasn’t purely out of vanity. I wanted to be sure to have excellent visibility in the future into any signs that one of my tabs is trying to break loose from either the topside or the wood. Coating everything with topside paint would make any such broken tabs immediately obvious. Without a coat of paint, a broken tab would be very hard to see.

Per the advice of a good friend who is also a naval architect (thanks Todd!) I coated the lead with epoxy to prevent off-gassing. Lead is toxic and should be coated when present in living spaces. Now I know.
Now the lead was ready to be strapped to the shelf. When mounting the shelf I had accidentally covered my original holes through the shelf with the knees, so I had to drill a bunch of new holes. Oops.
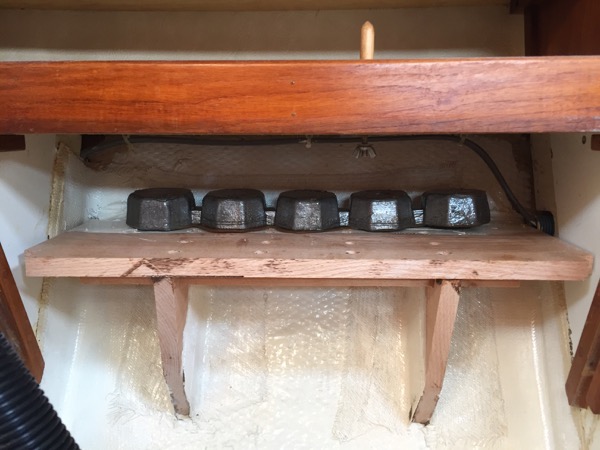
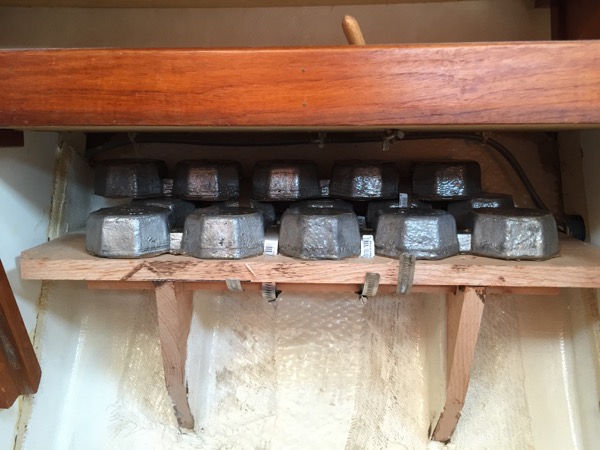
After a weekend’s work (not counting evenings fabricating the wood) I had 100 lbs affixed to my new shelf. The stove was put back into place…
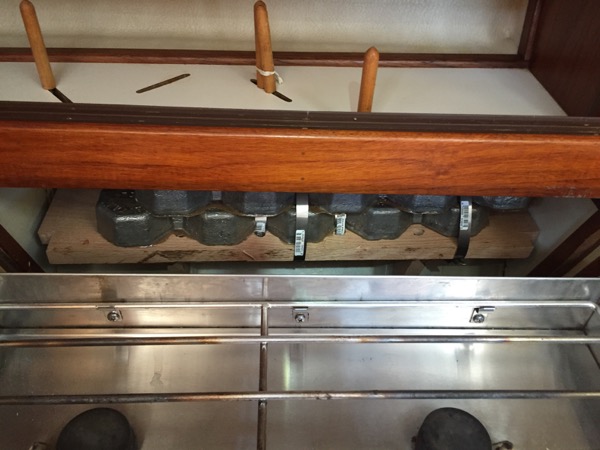
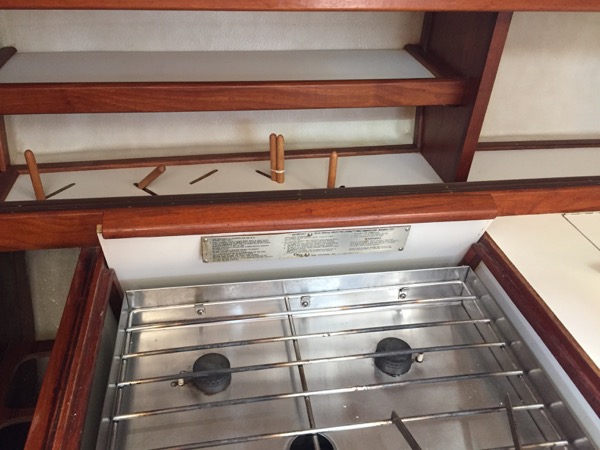
…and with the removable stove cover back in place, the lead cannot be seen. Woohoo!
Will 100 lbs of port-side lead bring Le Saberage back into trim? Stay tuned to our late July launch to find out!

Oh I really hope it works, in any event, it cannot be off by much! And it’s clearly an incredibly neat job!
It looks so much more weight wasteful than a mere 100 lbs really is! Hope it works, but my guess is that it won’t be off by more than what a few extra dishes could manage to contribute.